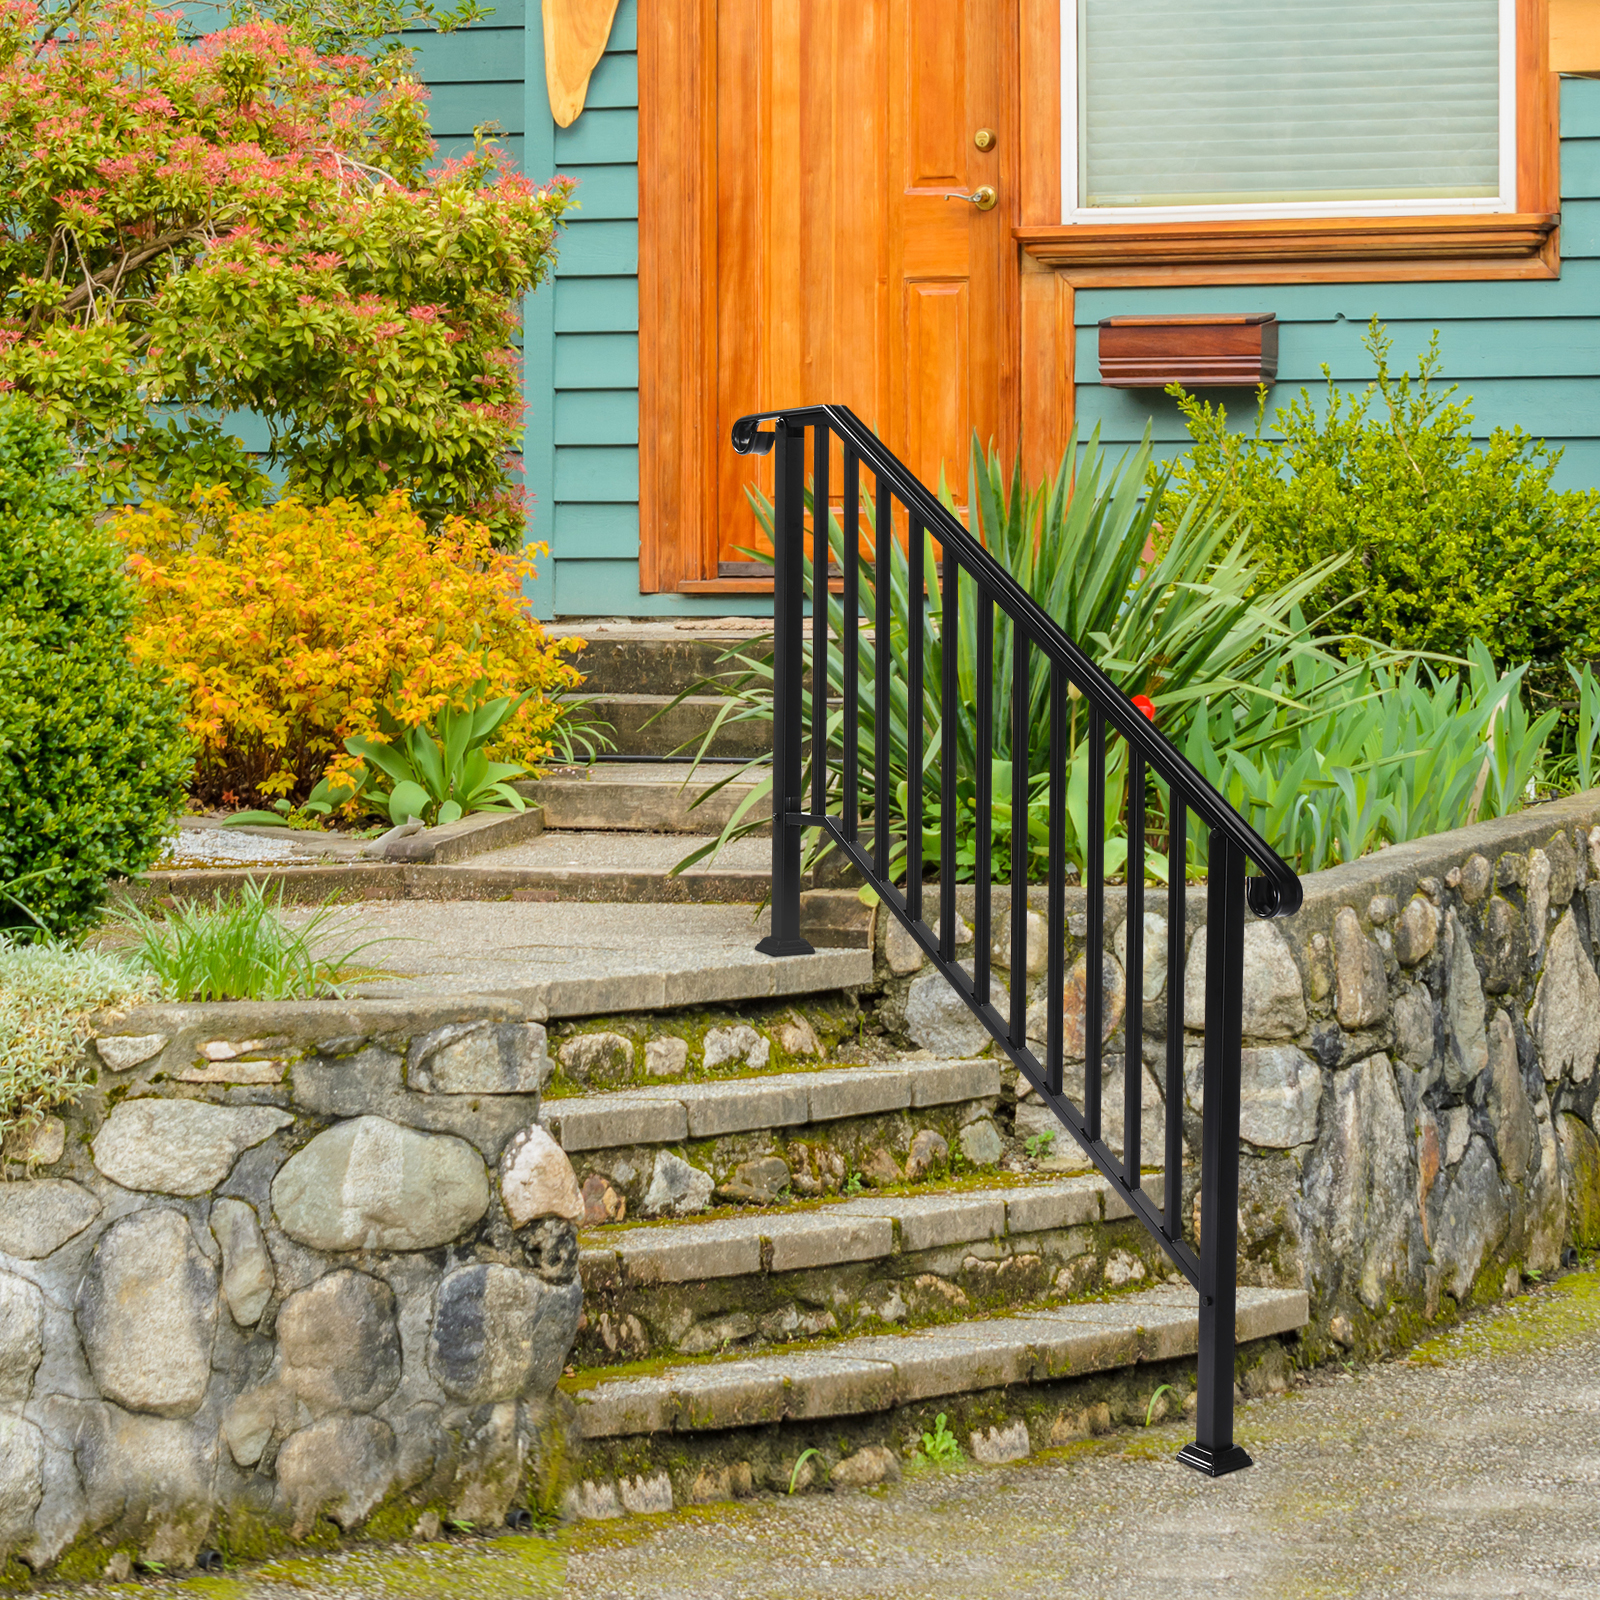
How to Install an Outdoor Iron Handrail for Garden Steps
Installing a sturdy handrail on your garden steps can make a huge difference in safety and curb appeal. It’s a project that looks more involved than it actually is. With the right guide and a solid product, you can do it yourself in an afternoon. I recently installed the Matte Black Outdoor Iron Handrail on my backyard steps, and I’m here to walk you through the entire process, from unboxing to the final tighten. The product I used: available here.
What You’ll Need
- Matte Black Outdoor Iron Handrail (for 4 or 5 steps)
- All included hardware (anchors, bolts, etc.)
- Power drill with masonry bits (if installing into concrete, stone, or brick)
- A standard drill bit for pilot holes in wood
- Tape measure
- Level (a 2-foot level is ideal)
- Pencil
- Wrench or socket set
- Safety glasses and work gloves
- Vacuum or brush for cleaning debris
Step-by-Step Guide
Step 1: Unbox and Verify Everything
First, lay out all the parts on a flat surface. You should have the main handrail assembly—which is surprisingly solid and nicely finished—and a hardware kit with post mounts, bolts, and anchors. Check that nothing is damaged from shipping. Familiarize yourself with the pieces; the post mounts are what will secure the rail to your steps, either on the side or on the top surface. This simple check saves a lot of frustration later.
Step 2: Plan Your Placement
This might be the most important step. You need to decide exactly where the handrail will go. Hold the rail up against your steps. For the most natural feel, position it so a person can comfortably grasp it while walking up or down. Usually, this means the top of the rail is about 34 to 38 inches above the step surfaces. Use your tape measure and pencil to lightly mark the planned location of the post mounts on both the top and bottom steps. Use your level to make sure your marks are plumb (perfectly vertical) with each other. Don’t worry if your steps are a little uneven; we’ll account for that.
Step 3: Mark and Drill Your Pilot Holes
Now, line up a post mount precisely over one of your pencil marks. Use the holes in the mount as a template and mark the center of each hole onto your step material. Do this for all mounting points. Put on your safety glasses. Here’s where material matters:
For wood steps: Use a standard drill bit slightly smaller than your bolts to drill pilot holes at your marks.
For concrete, stone, or brick: You’ll need a hammer drill or a power drill with a masonry bit. Select a bit that matches the size of the supplied wall anchors. Drill slowly and firmly to the depth specified for the anchors. I learned this the hard way when I rushed and didn’t drill deep enough for an anchor, which made the bolt impossible to tighten fully.
Step 4: Install the Post Mounts
Clean out all the dust from your holes—a quick vacuum or blast of air works great. If you’re using the included anchors for masonry, tap them gently into the holes until they’re flush with the surface. Now, position the post mount over the holes. This is much easier with a helper to hold the rail steady, but you can manage solo by supporting it with a box or block of wood. Insert the bolts through the mount and into the anchors or pilot holes. Start them by hand to avoid cross-threading, then use your wrench to tighten them down firmly. Avoid cranking with all your might; you want it secure and snug, not stripped.
Step 5: Attach the Handrail and Final Check
With the post mounts securely fastened to the steps, the final step is a breeze. Simply lift the handrail assembly and slide the bottom ends into the post mounts. The design should allow it to rest in place. There will be holes in the rail that align with holes in the mounts. Insert the remaining bolts and tighten them. This is totally normal if you need to give the rail a tiny nudge to get perfect alignment. Once everything is finger-tight, grab your level one last time and place it along the top bar of the rail. Adjust slightly if needed, then fully tighten all bolts with your wrench. Give the entire assembly a solid, two-handed shake test. It shouldn’t wiggle or feel loose.
Step 6: Clean Up and Admire Your Work
Brush away any metal shavings or concrete dust. That’s it! You now have a professional-looking, safety-boosting handrail on your steps. The matte black finish looks sharp against almost any background.
Pro Tips
1. Test for Pipes and Wires: Before you drill, especially on porch steps, make sure there are no electrical lines or pipes running underneath where you plan to mount the posts. A stud finder with AC detection can help, but when in doubt, drill a test hole slowly through just the surface material first.
2. Pre-Assemble on the Ground: For absolute precision, you can loosely attach the post mounts to the handrail on a flat driveway or garage floor first. This lets you confirm the exact spacing before you make any marks on your steps.
3. Protect the Finish: When tightening bolts, place a cloth between your wrench and the beautiful matte black powder coat to prevent any accidental scratches during installation.
Common Mistakes to Avoid
Assuming Your Steps are Level: Outdoors, steps are rarely perfectly level or plumb. Trust your tape measure and level over your eyesight. Measuring twice and drilling once is the golden rule here.
Overtightening Bolts: It’s tempting to crank down as hard as possible. Over-tightening can strip the threads in the anchors or warp the metal mounts, compromising the hold. A firm, decisive tighten is sufficient.
Skipping the Cleaning Step: Not cleaning out the drill holes in masonry before inserting the anchors is a recipe for a weak hold. That dust and grit will prevent the anchor from seating properly.
Expected Results & Timeline
You should expect a rock-solid, stylish handrail that provides essential support and prevents slips and falls. The galvanized iron construction and powder coating mean it will stand up to rain, sun, and changing seasons without rusting. This isn’t a flimsy accessory; it’s a permanent safety upgrade.
For timeline, a typical DIYer can complete this project in 2 to 3 hours. It breaks down like this: 15 minutes for planning and layout, 30-45 minutes for drilling (depending on your step material), 30 minutes for installing mounts and the rail, and the rest for double-checking and cleanup. Take your time, follow the steps, and you’ll end up with a result that looks like it was done by a pro.